To modify or create clinical assessments, navigate to the “Clinical Assets” from below Administration in the dashboard side panel. Then click the “Clinical Assessments” tab.
If you already have an assessment that you would like to edit, click the “Edit” link adjacent to the assessment name. If not, click on the “New Assessment” button to create a new assessment.

Editing or creating a new assessment will open the assessment authoring interface. The interface contains a number of capabilities which empower the user to create robust clinical assessments.
Basics of Creating Assessments
- Specify the name of the assessment
- Indicate if the assessment is scorable
- Click the “Add Question” button
- A prompt will display to add the question name
- Enter the question and click “Save”
- Within the question block, choose an appropriate response type for the question. Curitics supports the following response types:
- Date (entry of a date)
- Multi (selection of multiple predefined responses)
- Select (selection of a single predefined response)
- Textarea (a multi-line free-form text input)
- Text (a single-line free-form text input)
- If “Select” or “Multi” are chosen as the question response types a panel will be shown whereby predefined responses can be curated. Clicking the “Add Response Option” button allows for additional options to be added

Building Advanced Display Rules
Often, use cases exist where a question should be displayed only if the response value of a previous question equals or does not equal a certain response. Curitics provides robust capability around configuring advanced display rules within assessments.
- To configure a new display rule, click the “Display Rules” button inline with the Question Name
- By default all questions have a Display Type of “Always Show”. To create a rule in which the question can be shown conditionally, change Display Type to “Show Conditionally”
- A new panel will populate where the rule can be configured. First select the question which will drive the display of the question in which the display rule will be applying
- Then choose which Response will trigger the question to show
- If you wish for this rule to look at a negative/inverse scenario (whereby the response is NOT equal to the chosen option) select the “Is Not Equal” checkbox.
- Multiple questions can be configured as part of the ruleset. To add additional questions or responses to your ruleset, click the “Add Question” button
Click the “Save” button to save the new rule. A colored indicator will appear next to the question name to indicate that a display rule applies.

Score-Based Coding Recommendations
Scorable assessments which are embedded within encounter forms can automatically generate suspect conditions based upon score range thresholds configured within the assessment component.
- Ensure that the assessment is scorable. This can be verified by ensuring the “Is Scorable” checkbox is selected beneath the assessment name
- Ensure scores have been configured for all applicable responses
- For response options which already exist, scores can be added by clicking the “Edit” link adjacent to each response option name
- Within the panel on the right, click “Add Score Range”
- On the displayed interface input:
- The minimum score range for the suspect code to generate
- The maximum score range for the suspect code to generate
- The desired suspect code (after typing 3 characters the interface will return a search result against the ICD-10 master dataset. Searching by code or description is permitted)
- Click “Save” to store the suspect configuration

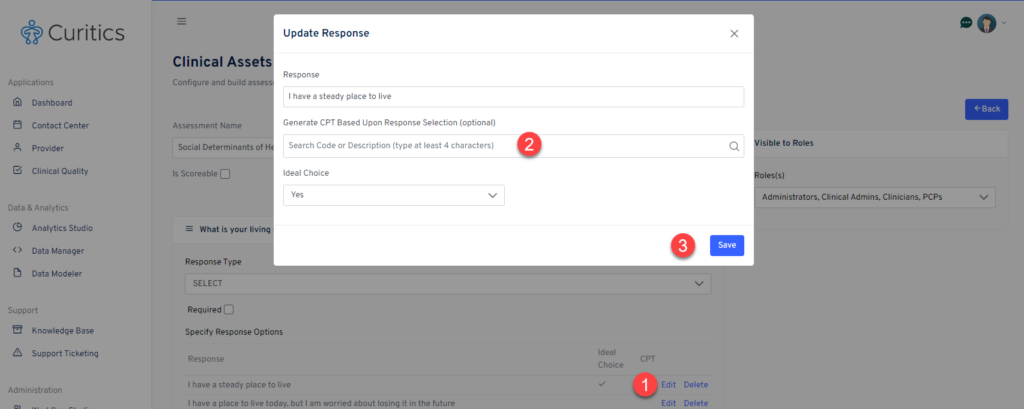
Generating CPT Codes from Response Values
CPT codes can be generated from specific responses within assessment materials. To configure CPT generation rules within assessments, edit the response value, search for a CPT to include and click “Save”
Deleting Questions and Response Values
Assessment authors can easily delete questions and response values by clicking the “Delete” buttons inline with each. It is important to note that if an assessment is in use and questions or response options are deleted, permanent data loss can occur. Curitics provides warning messaging to prevent accidental deletion.
Controlling Access to Assessment Materials
The “Visible to Roles” panel provides the ability for assessment authors to choose the specific roles which will have access to the assessments embedded within Encounter Forms or through the ad-hoc assessment component in the longitudinal member record. One or more user roles can be selected.
