Curitics supports a wide variety of Electronic Data Interchange (EDI) transactions, streamlining data exchange between healthcare organizations, providers, and payers. One of its key features is the ability to create and export 837P claims, a common use case in healthcare data management.
The 837P (Professional) claim format is an EDI standard used for submitting healthcare claims information from providers to payers, detailing services rendered, patient demographics, diagnosis, and billing information. By supporting this widely adopted standard, Curitics ensures seamless data exchange and integration with various healthcare systems.
Client Specific EDI Configuration
Within the EDI Configuration tab of the module, a user can find a list of their clients with their Payer ID, Address, City, State, Postal (Zip Code), Last Update status, Chargemaster Count, and a list of Actions to either update this information or make updates to the Chargemaster.
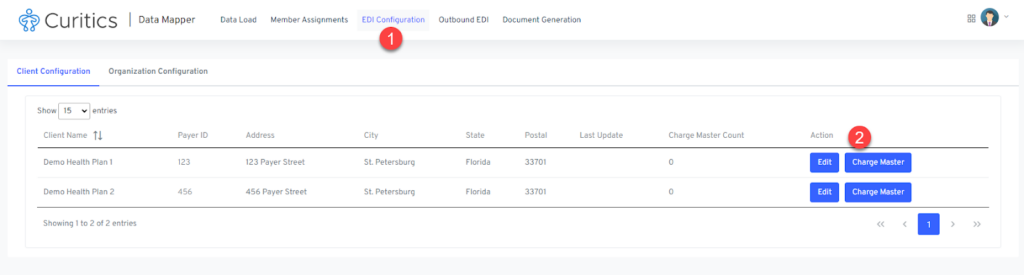
Users can modify core configurations by selecting the “Edit” button available for each client.
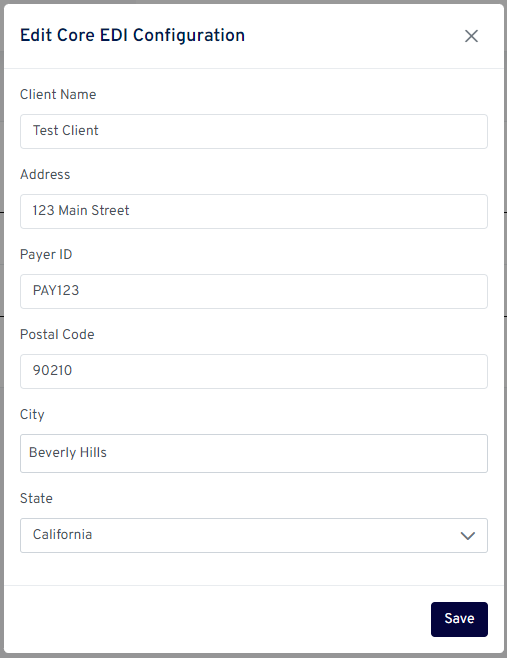
The following client level configurations are required:
- Client Name (this will represent the payer name in generated EDI files)
- Address (of payer)
- Payer ID (the payer id from the clearinghouse in which claims will be submitted to
- Postal Code (of payer)
- City (of payer)
- State (of payer)
Important Instance Level Configurations
During your Curitics implementation, your solution engineer will work with you to capture the following details related to your billing process. These configurations will be added within the underlying metadata configuration layer of your instance and will be used during the EDI generation workflow.
- Organization Name
- Tax ID/EIN
- Registered Address (including address, city, state and postal)
- Primary Billing Contact Name
- Billing Contact Phone Number
- Billing NPI
- Your solution engineer will also work to define any requirements as to where your NPI should be used or whereby another parties NPI should be used based upon the unique use case of your program
- Preferences as where the servicing provider NPI should be used
- Desired Clearinghouse
- Clearinghouse Tax ID/EIN
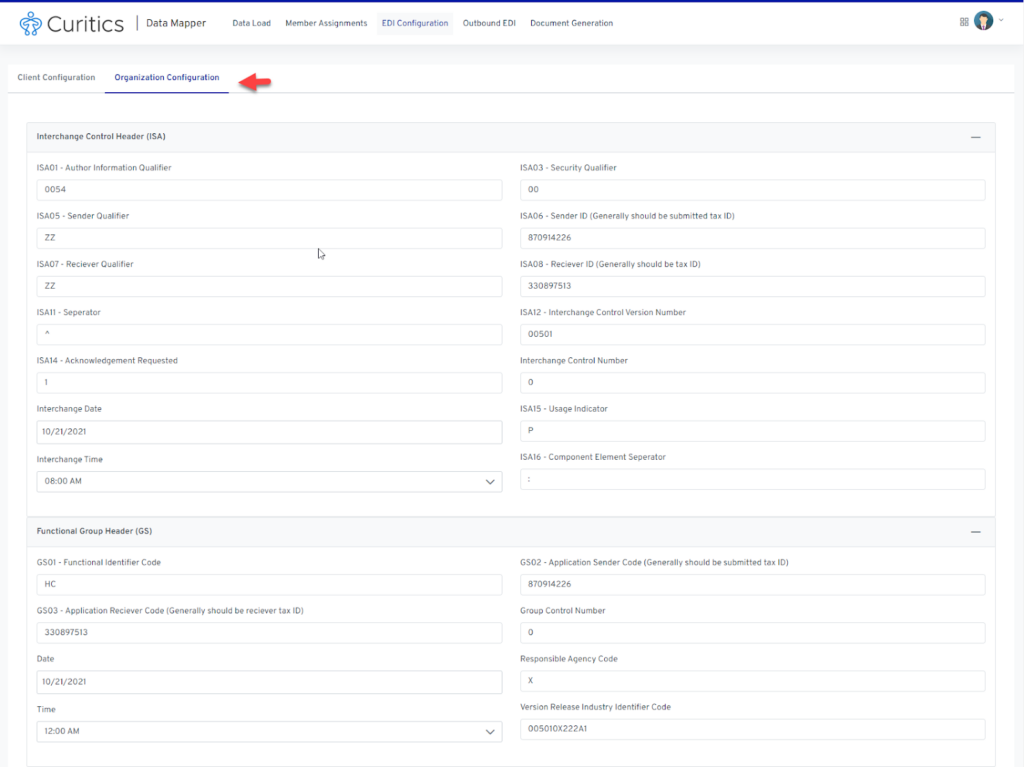
Changes to this information can be made at any time by navigating to the Data Manager followed by EDI Configuration and then accessing the Organization Configuration tab.
Configuring the Chargemaster
The Charge Master contains mappings for each Visit Type and billable CPT Code and how they should be billed in a claim file for that client. This allows for variability of how visit types and CPT Codes are billed for members associated with different clients with various contractual rates.
The interface can be accessed by choosing the “Chargemaster” button available for each unique client.
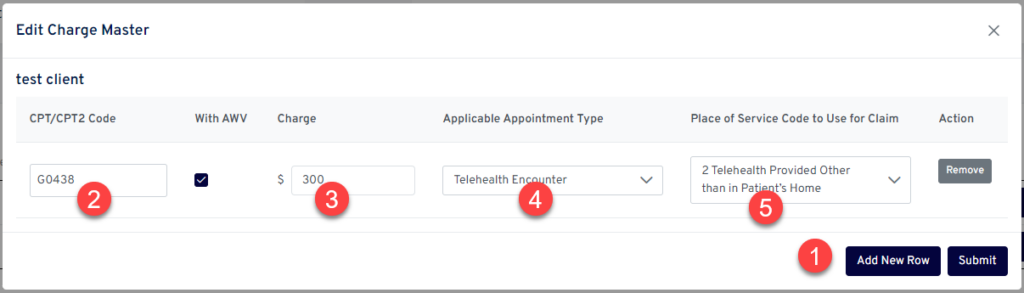
The interface provides the following capabilities
- An ability to add additional rows whereby unique CPT/Visit type combinations can be considered
- Ability to search for a specific CPT code in which to apply charges for during claims generation
- Input for charge (in US dollars, decimals accepted – do not indicate $ symbol)
- Input for which appointment types the charge is applicable to
- Selection for place of service code to use during claims generation