The “Encounters” tab within the longitudinal record enables users to view upcoming appointments, view past encounters and interact with the encounter documentation.
Viewing Upcoming Scheduled Encounters
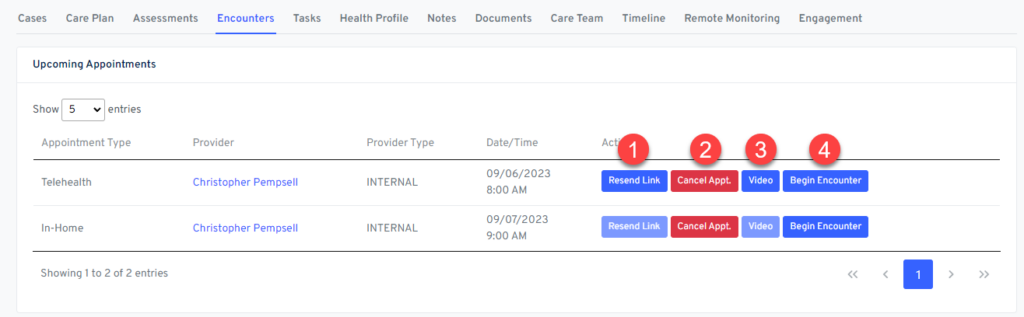
A list of upcoming appointments is available within the Upcoming Appointments panel within the Encounter section. The user has the following options:
- Resend Link (only applicable for telemedicine encounters, functionality resends the link to join the conference to the patient)
- Cancel Appt (enables the clinician to cancel the appointment)
- Video (enables the clinician to test the video room)
- Begin Encounter (enables the clinician to access the clinical documentation)
Interacting with In-Flight Encounters
Encounters can be saved in Draft status. This enables clinicians to review additional notes and add feedback at a later time. Encounters in draft mode can be reopened at a later time and subsequently submitted. The user has the following the following options available when interacting with encounter data:
- Download PDF (view a PDF summary of the encounter)
- View (ability to view the encounter in read-only mode)
- Re-open (Re-open, create new draft from encounter)
- Delete (only available for drafts, ability to delete drafts)
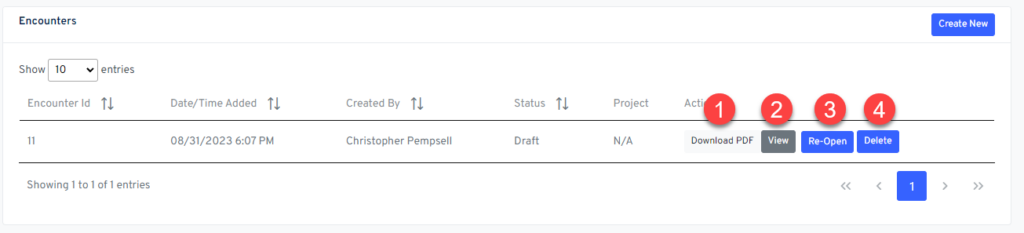
Users may also choose to create ad-hoc encounters (without a prior scheduled appointment) by clicking the “Create New” button in the upper right of the panel. The system will generate provider availability, and an appointment at the current time in response to this action. User must select an applicable project where members are assigned to multiple.
Interacting with Encounter Documentation
After clicking the “Begin Encounter” or “Re-open” buttons from the main encounter tab, users can interact with the encounter documentation configured for the project in which the member is assigned. If the member is assigned to multiple projects, a choice is available whereby the clinician can choose the desired encounter documentation template.
The interface has several notable features:
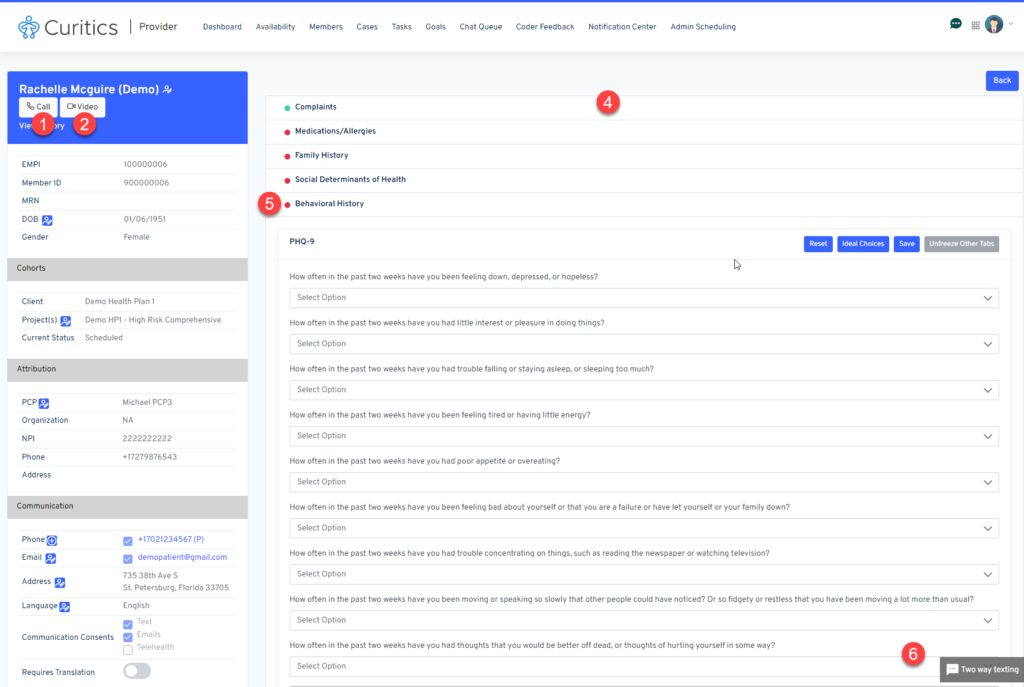
- For telehealth visits, the clinician can open the room by clicking the “Video” button in the upper left, above the demographics card
- If the telehealth room URL needs to be resent to the patient, the button marked #2 can be clicked
- Similarly if the user needs to invite a translator to the telehealth session, the button marked #3 can be clicked
- The right panel of the interface contains any clinical documentation configured for the project and appointment type within the tool.
- Each section can be expanded and collapsed by clicking its name
- A red and green indicator exists to the left of each section name. This indicates the completeness of these section. Once all sections are completed, the indicator will change from red to green
- The user may engage in bi-directional text at the time of the encounter by accessing the option in the lower right
As indicated by the red square above, each clinical asset composing the encounter has the following options:
- Reset (clear all current entries)
- Ideal Choices (prepopulate the asset with ideal choices, if configured)
- Save (save entries to the desired section)
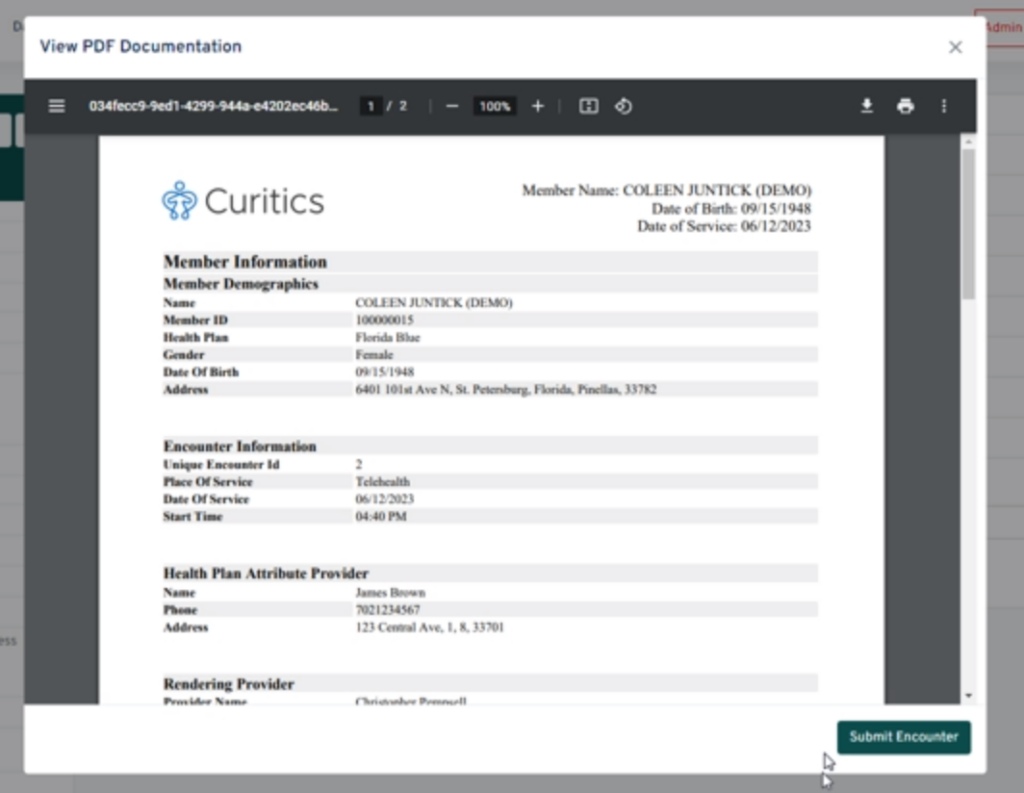
Submitting Documentation
After completing all required sections within the clinical documentation as indicated by the green dots adjacent to each section, the user may submit the documentation to a complete status. Upon moving the documentation to a complete status, the user will be prompted to review a PDF preview of the clinical documentation before proceeding.